


 2
2
Registering for courses happens in My Relay Portal, in three main steps: select your courses, optionally preview your schedule, and complete your registration. This article walks you through each and helps you understand the icons and functionality of each page.
Table of Contents
- Accessing Your Registration Portal
- Step 1 – Select Your Courses
- Step 2 – View Your Schedule (Optional)
- Step 3 – Complete Your Registration
- Need Help?
Accessing Your Registration Portal
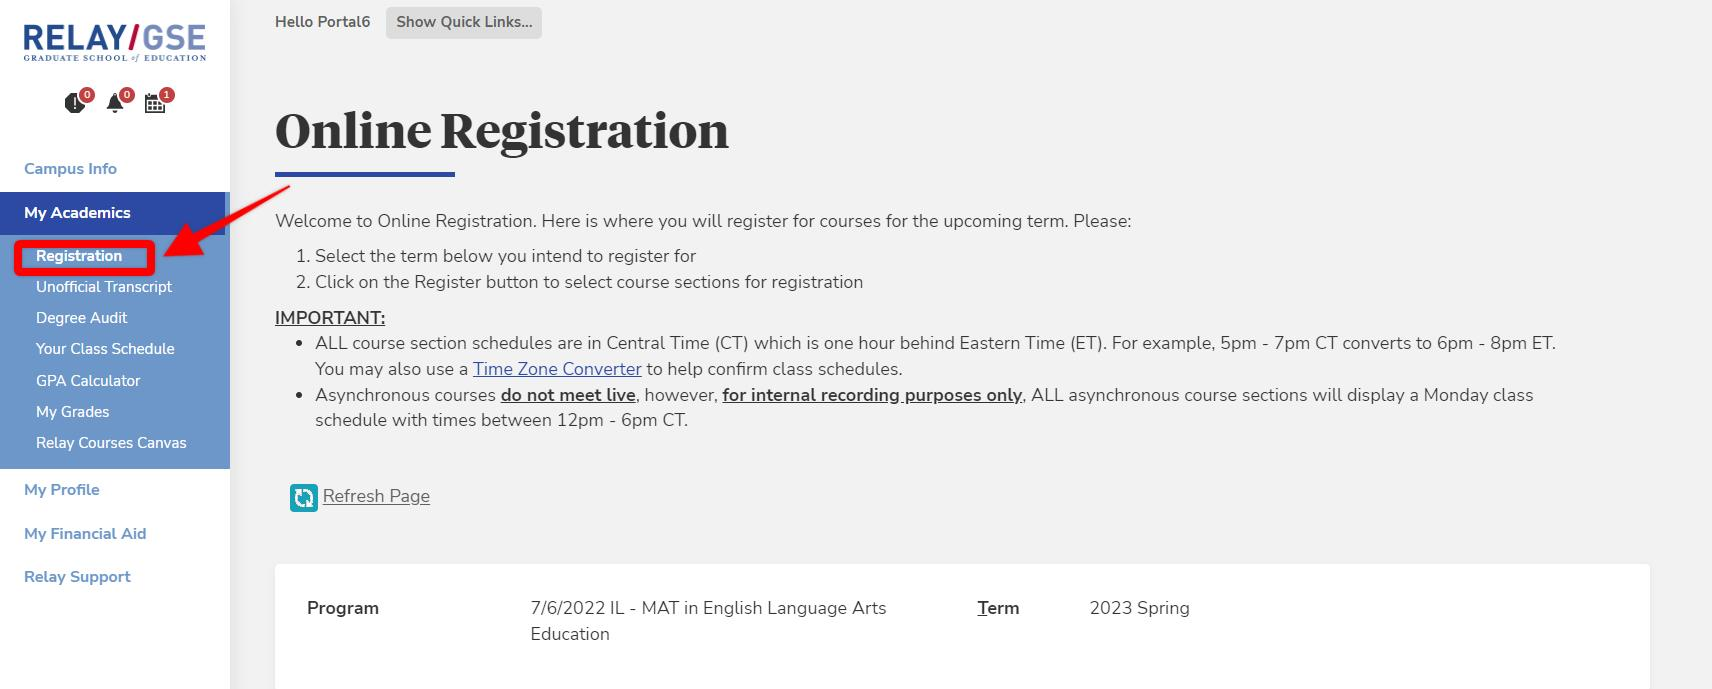
- Go to My Academics > Registration.
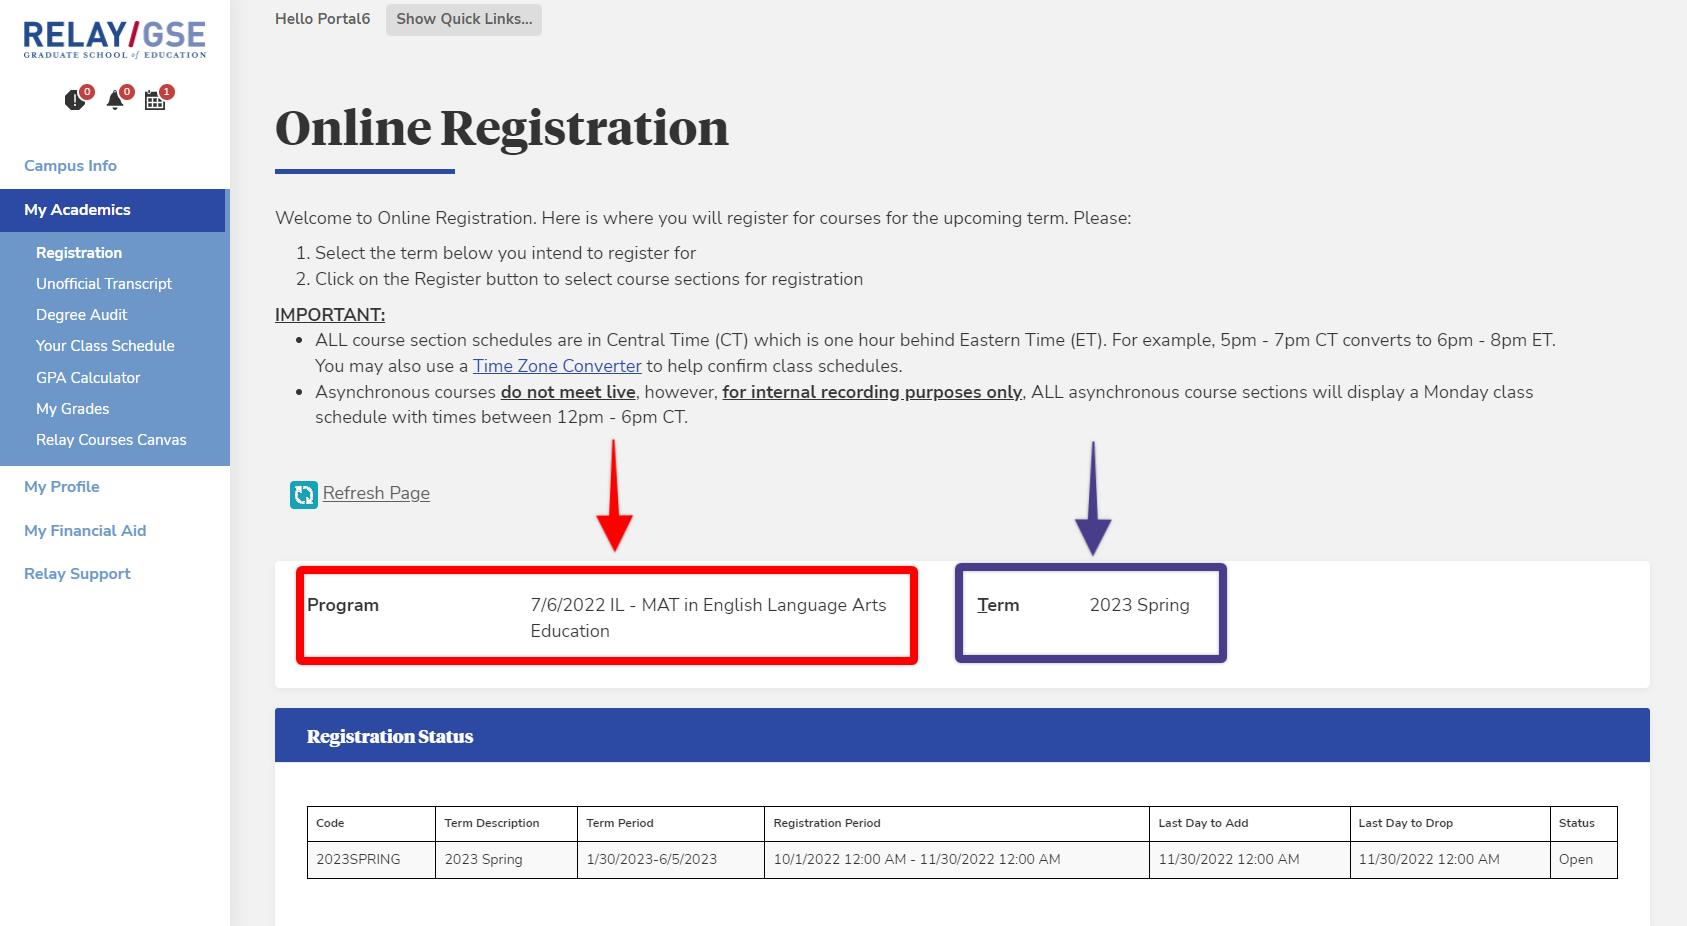
- Select your Program. If you're only enrolled in one program, it's already selected for you. If you're enrolled in more than one, you'll see a message showing how many — choose the one you want to register for. Not sure which one? Reach out to your advisor.
- Select your Term. If only one term is available to you, it's already selected.
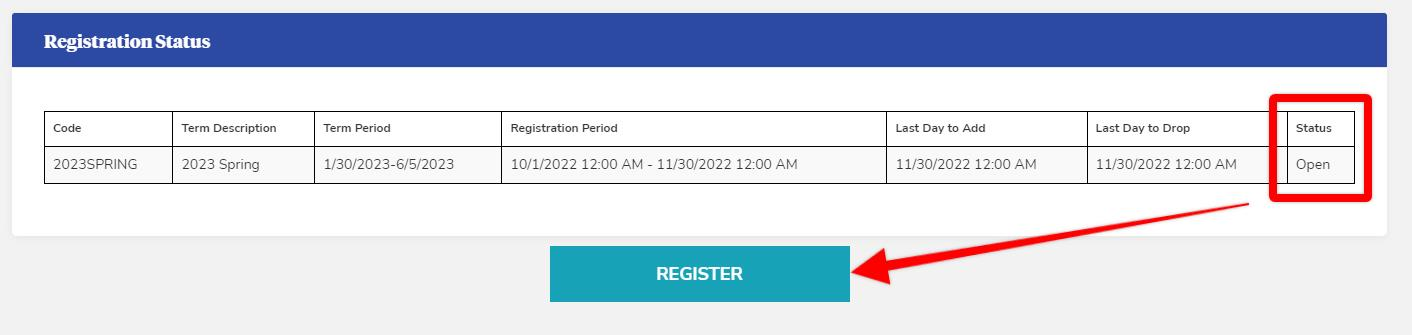
- Check your Registration Status. If it shows "Open," select Register to move on to Step 1 – Select Your Courses.
🎥 Watch a video walkthrough of this step
Step 1 – Select Your Courses
🎥 Watch a video walkthrough of this step
|
|
|
|
|
|
|
|
|
|
|
|
|
|
|
|
|
|
|
|
|
|
|
|
|
|
|
|
|
|
|
|
|
|
|
|
|
|
|
|
|
|
|
|
|
|
Courses with no icon in front of the code are neither required nor elective.
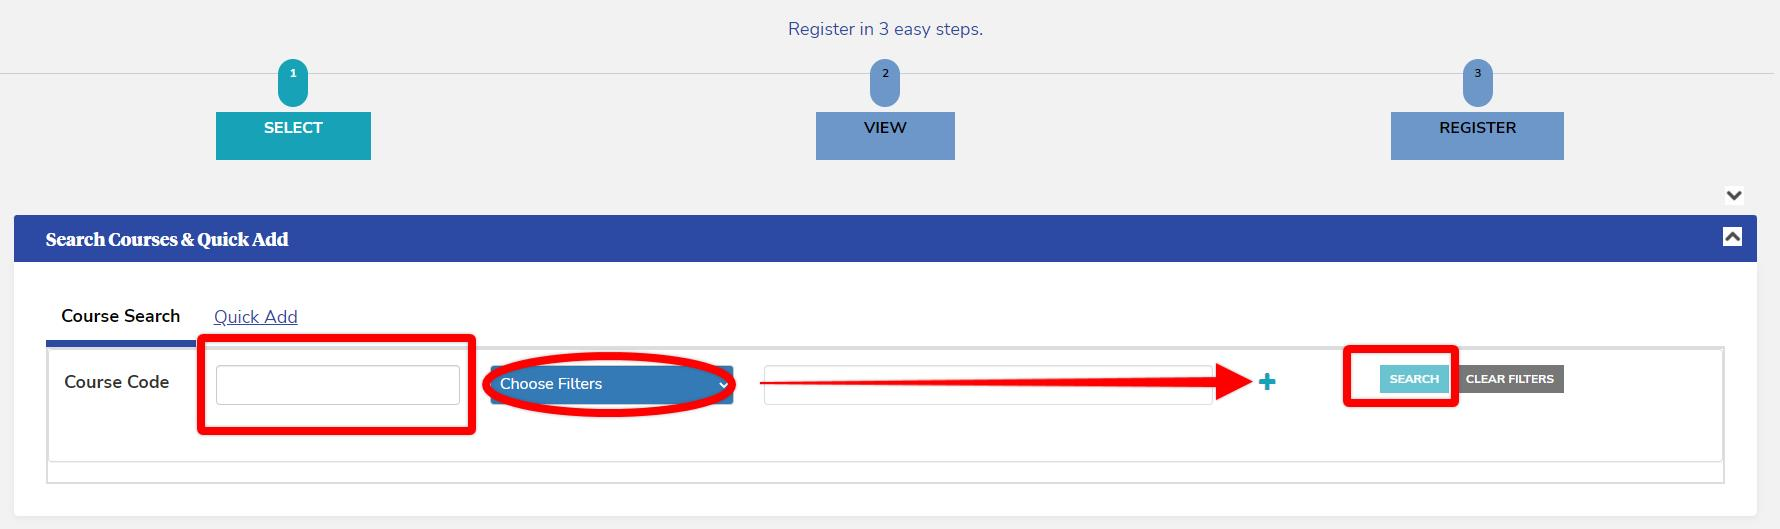
- The page defaults to the Course Search tab, shown above. Enter your criteria, then select Search. You can filter by:
- Course Code (at least 3 characters)
- Course Type (for example, Lecture, Clinical, Capstone, or All)
- Course Level
- Course Attributes
- Meeting Days
- Class Time Range
- Building
- Location
- Section Code
- Shift
- Class Dates
- Delivery Method
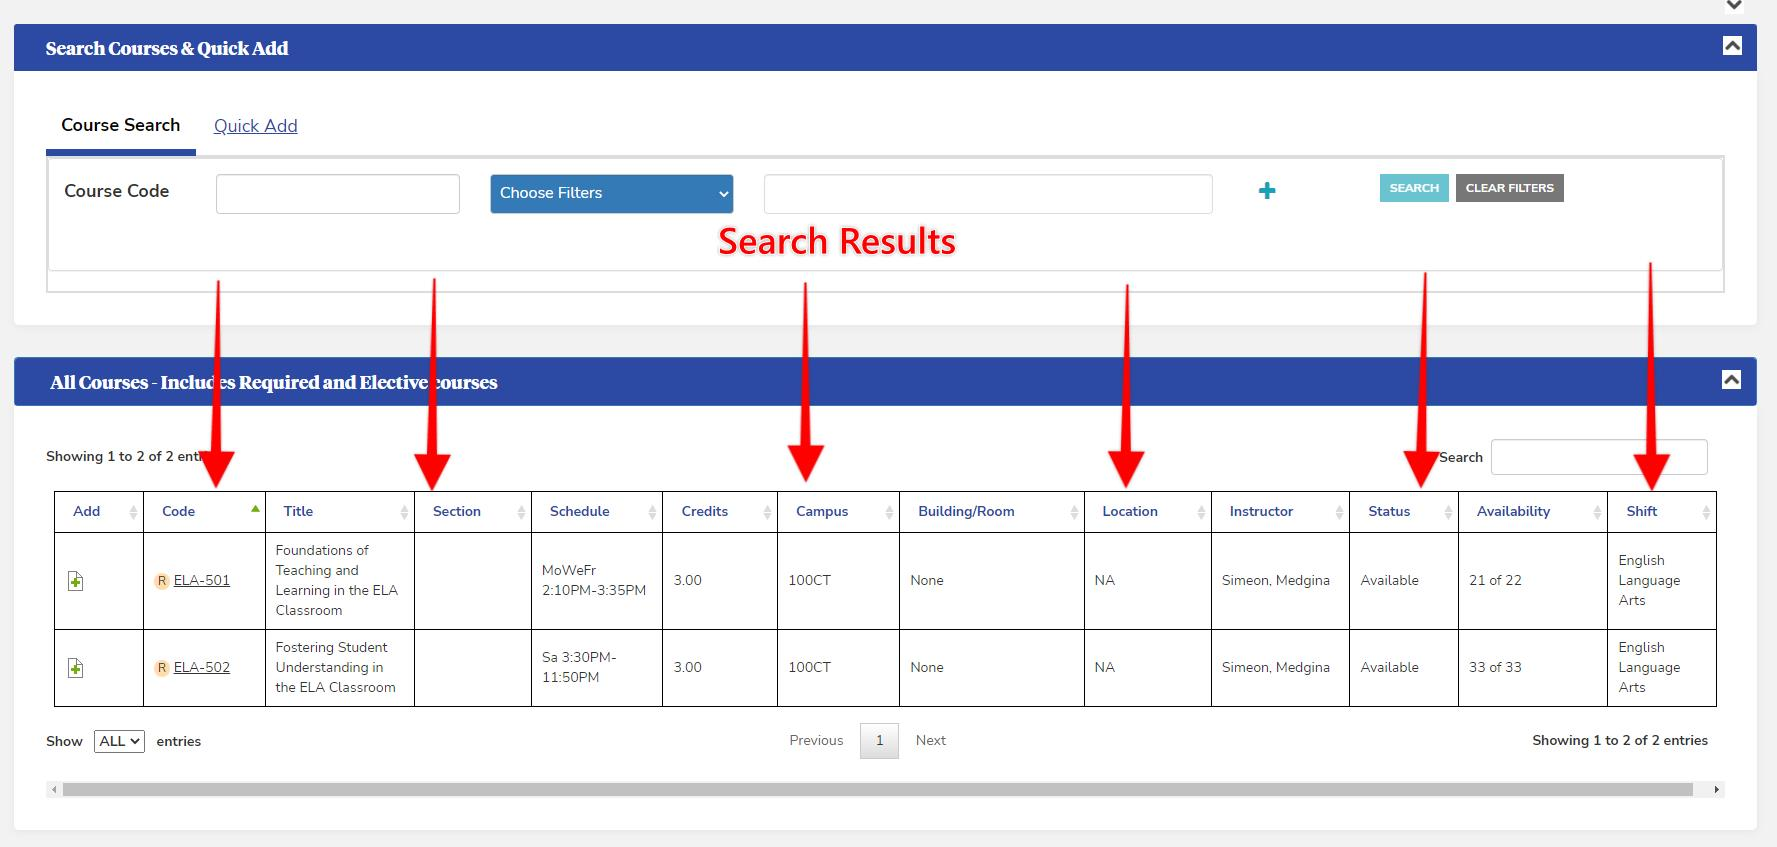
- Review your results in All Courses.
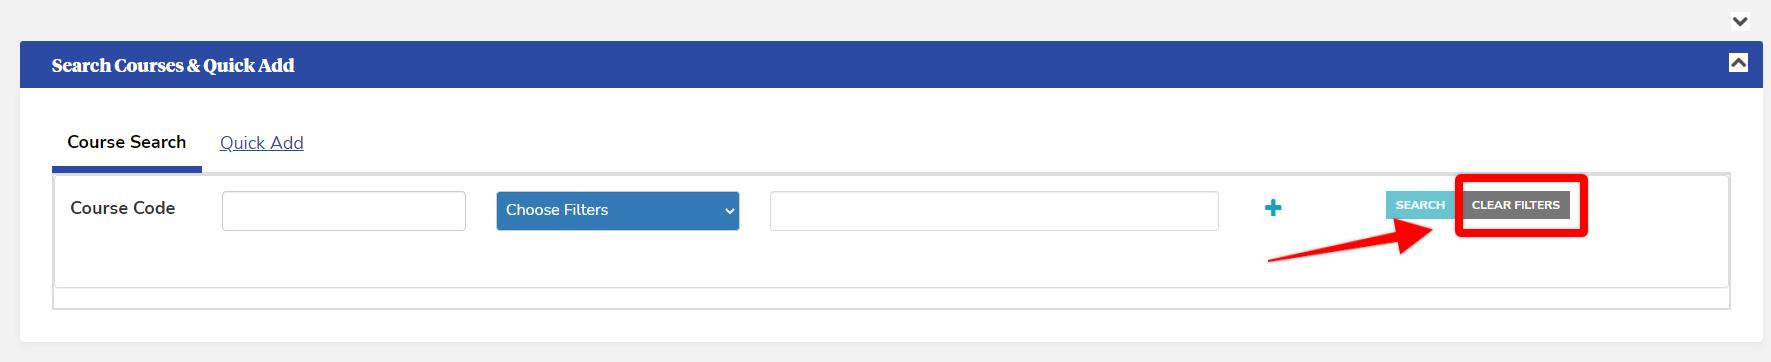
- Select Clear Filters any time you want to reset back to the default list.
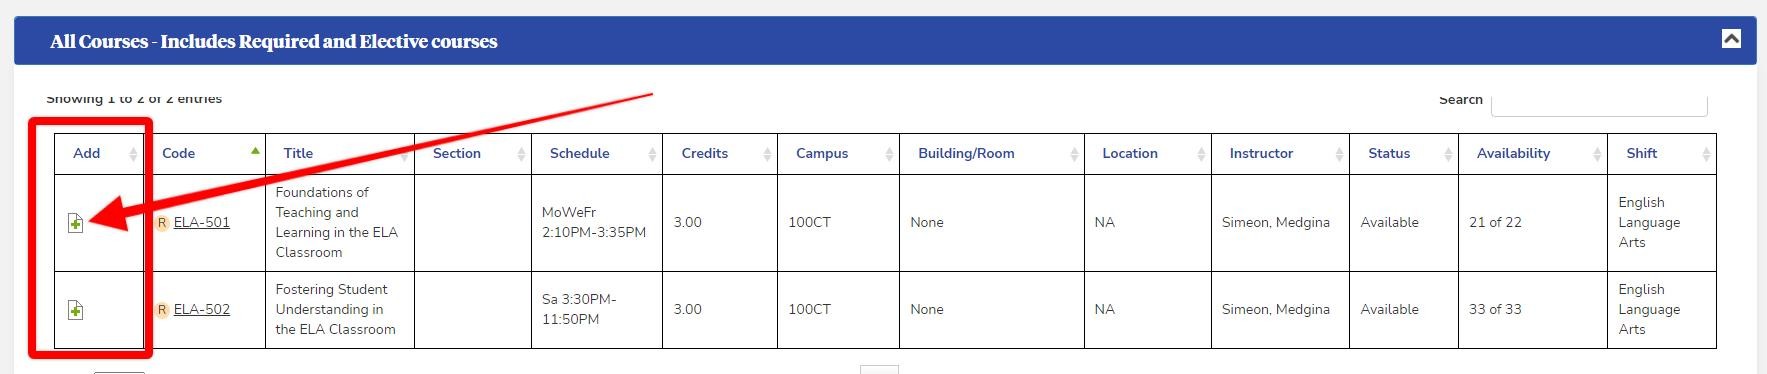
- Select the Add icon next to the section you want.
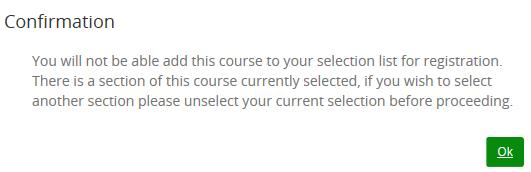
- If the course has prerequisites or corequisites, a window opens with the details. You can't register or join the waitlist until every prerequisite rule is met — required courses, minimum grades, and any testing requirements. If the course has corequisites, you'll need to register for all of them at the same time before you can move forward.
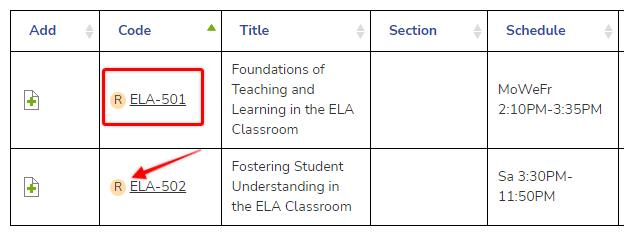
- Check for an R or E icon in front of the course code to confirm whether it's Required or Elective for your program.
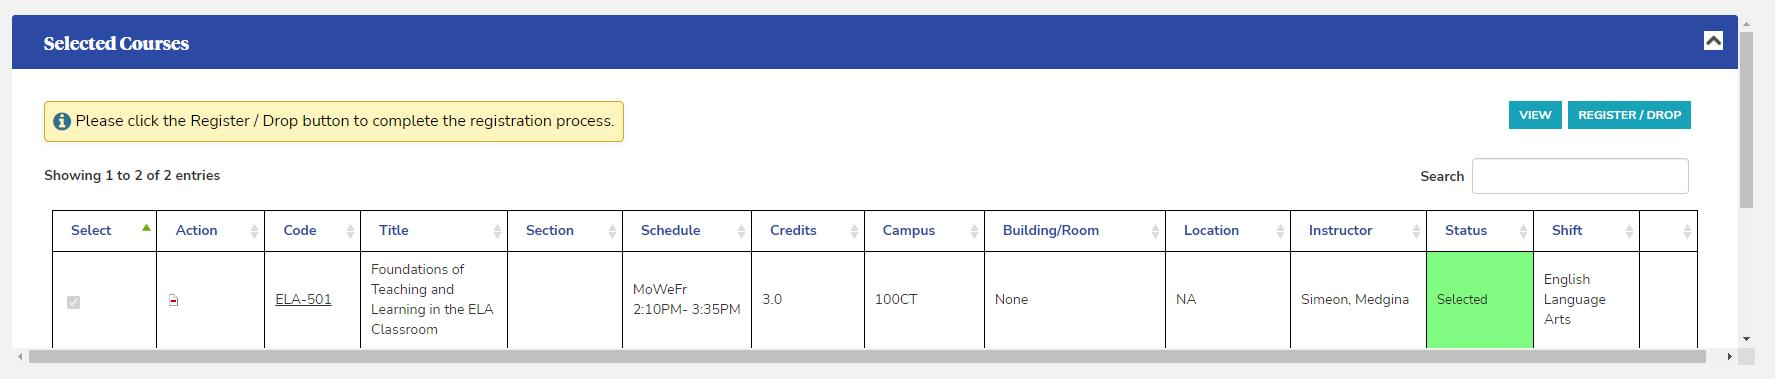
- Check your choice in Selected Courses.
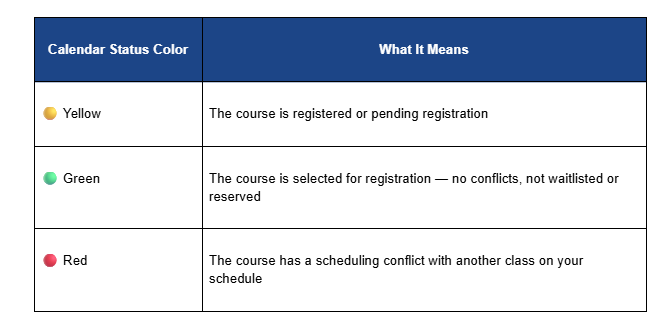
- Each course will show a status — see the table above for what each one means.
- Next to Selected Courses, the Registration Summary panel shows your total classes and credits based on your current selections. Expand it to see those totals broken down by Selected, Reserved, Registered, Audited, and Waitlist status.
- Once your selections look right, choose one:
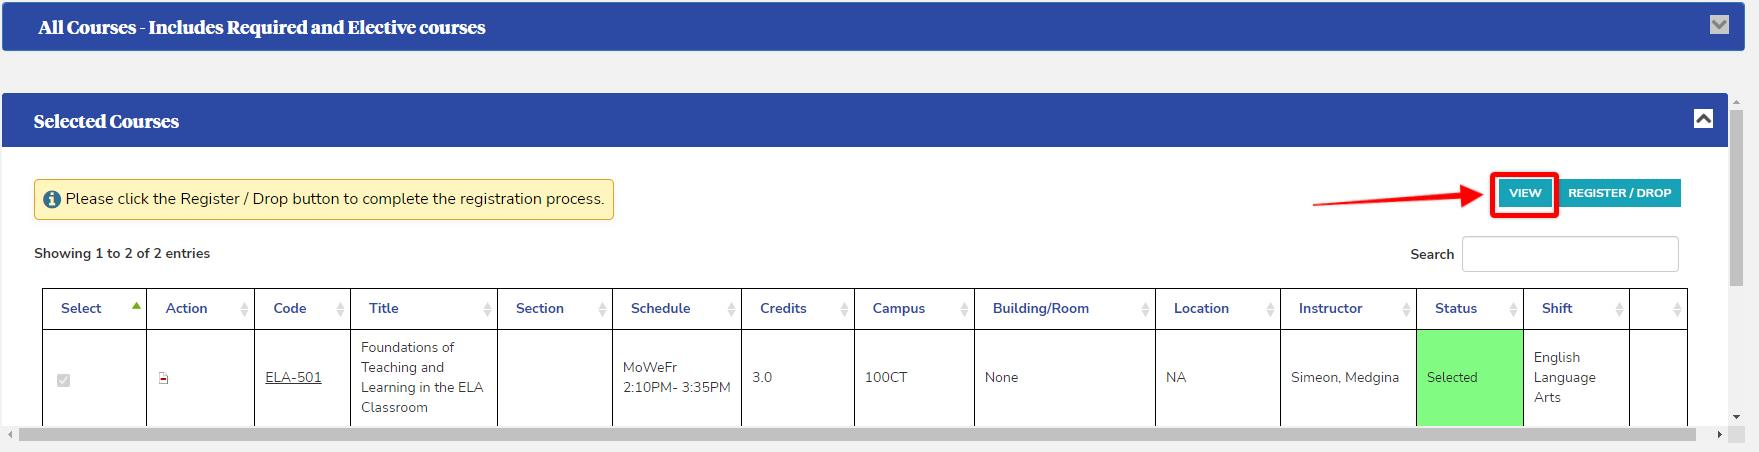
- Select View to go to Step 2 and review your schedule before registering (optional)
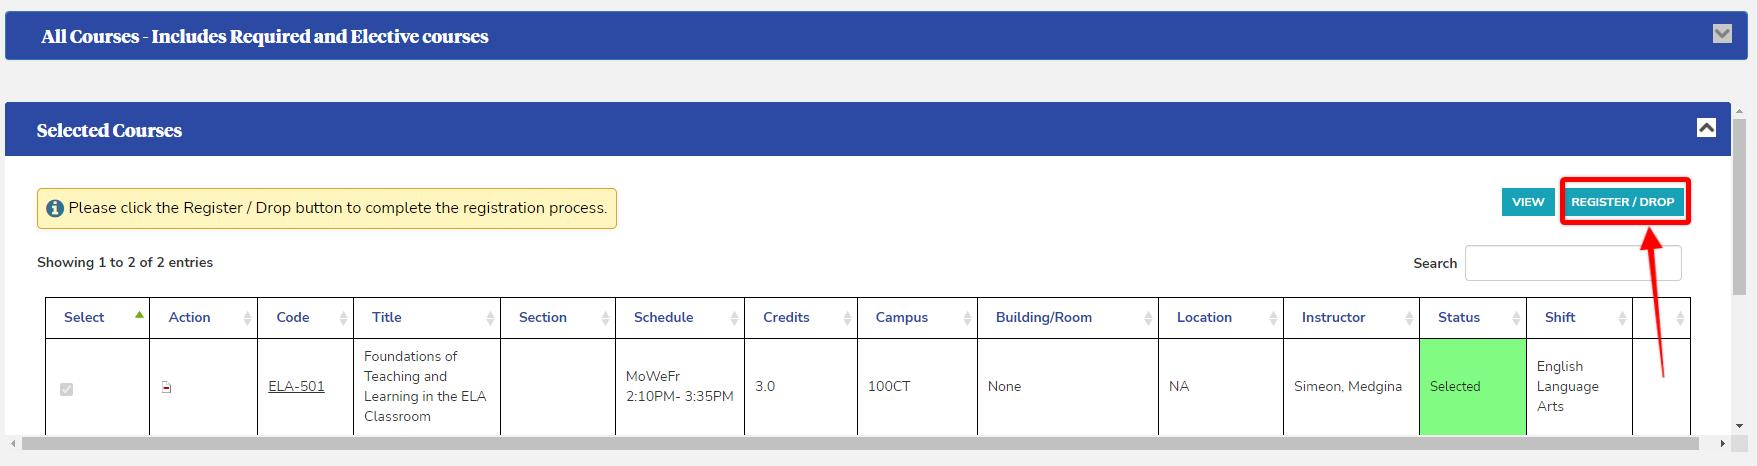
- Select Register/Drop to skip Step 2 and go straight to Step 3 to finish registering
Things to Know
- Courses you've already taken and passed generally won't show up in All Courses.
- If you failed a course, it'll still be available to register for again — as long as you haven't already attempted it more times than we allow.
|
|
|
|
|
|
|
|
Step 2 – View Your Schedule (Optional)
This step lets you preview your selected courses in calendar view before you officially register — a good way to double-check days, times, locations, and instructors.
🎥 Watch a video walkthrough of this step
|
|
|
|
|
|
|
|
|
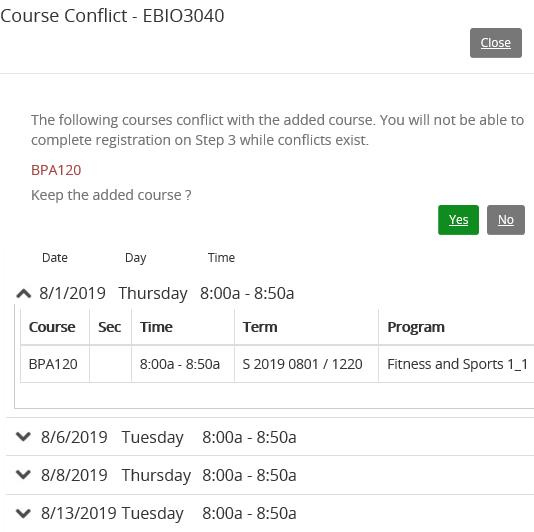
Pending classes don't count as conflicting with pending drop classes.
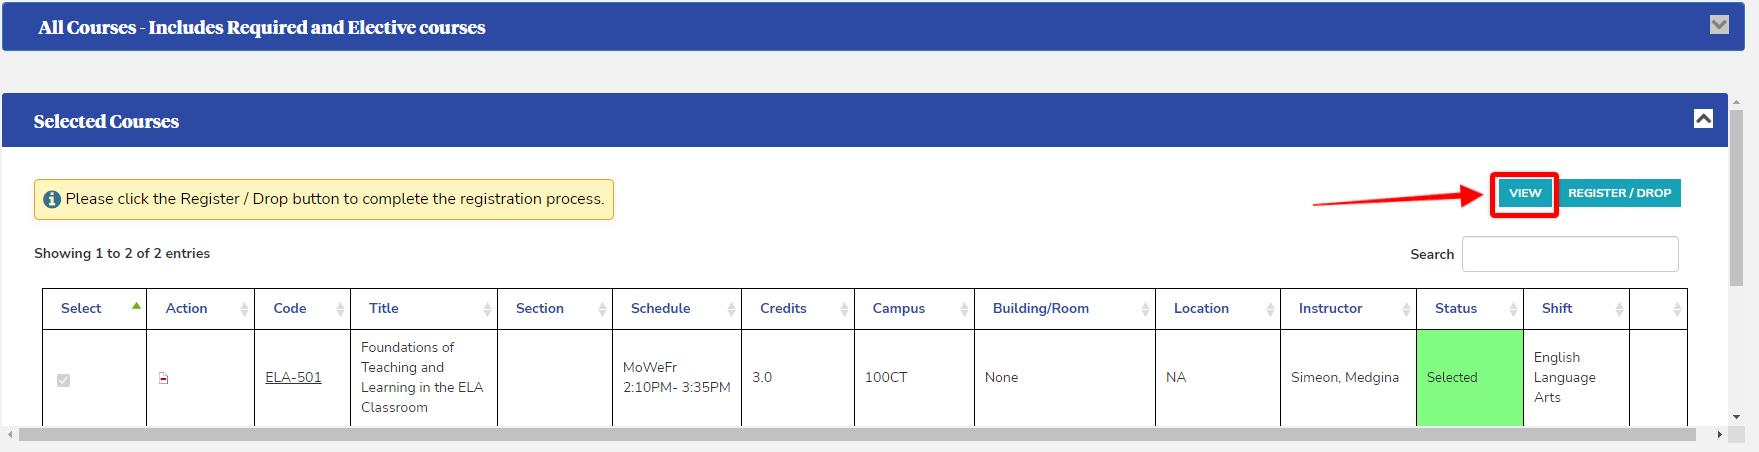
- From Selected Courses, select View to open your calendar.
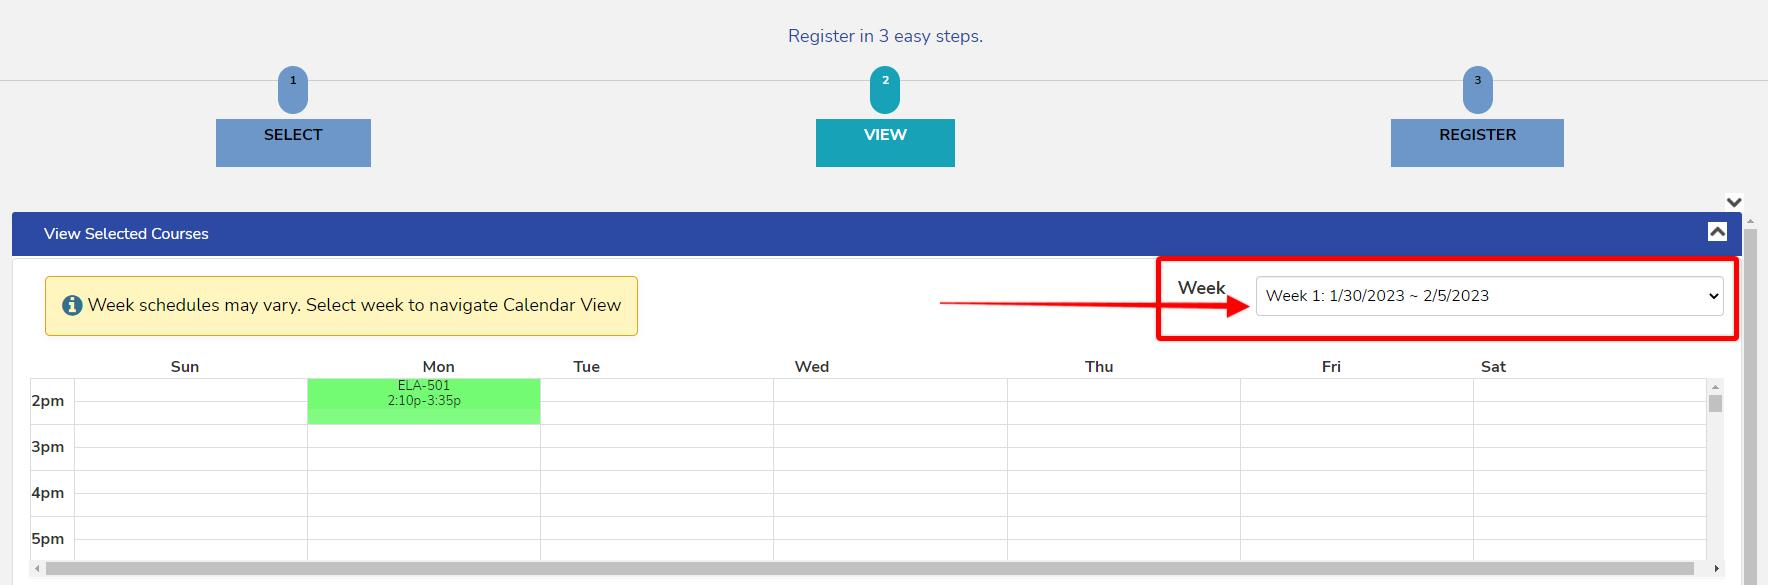
- Choose the week you want to look at from the drop-down in the top right.
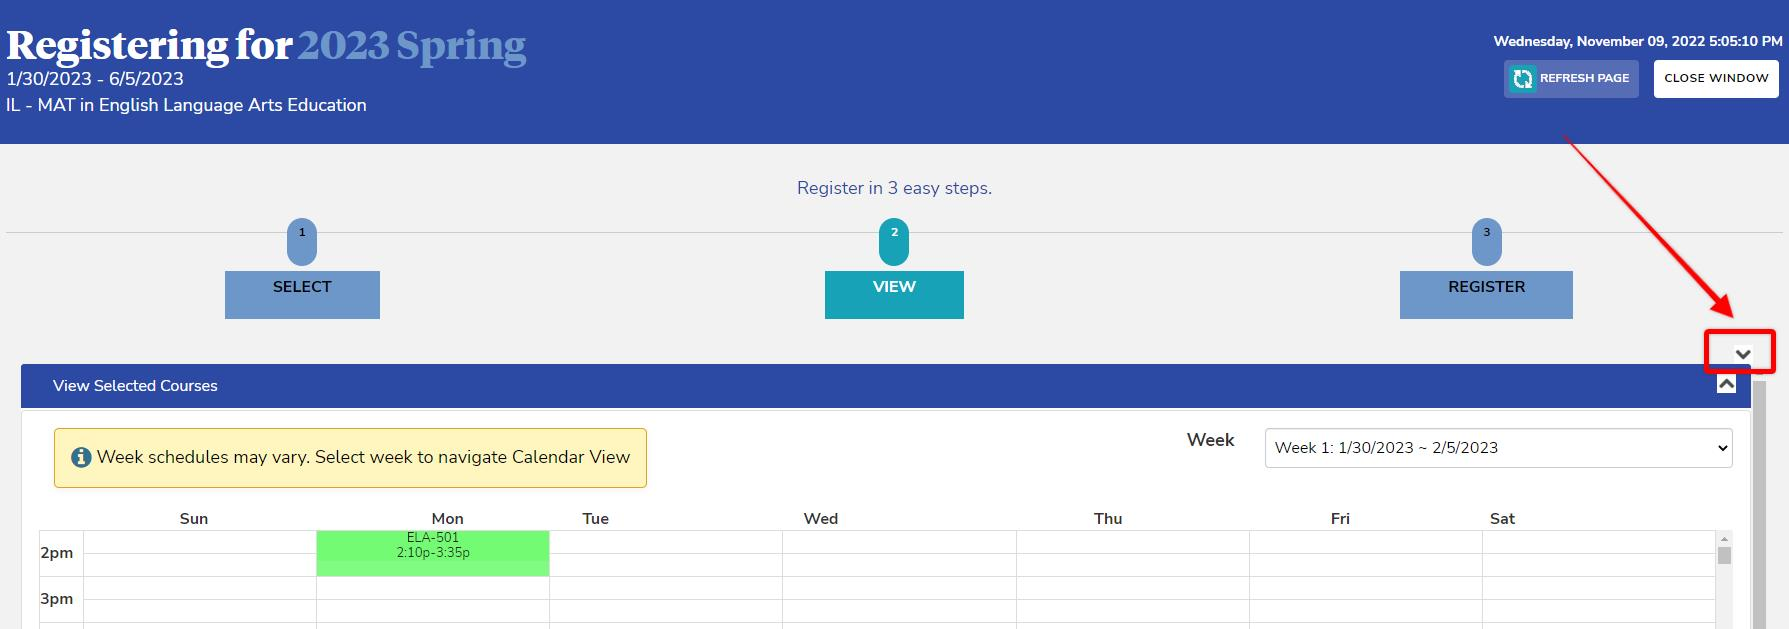
- Select Expand in the header any time you want to revisit the icon legend.
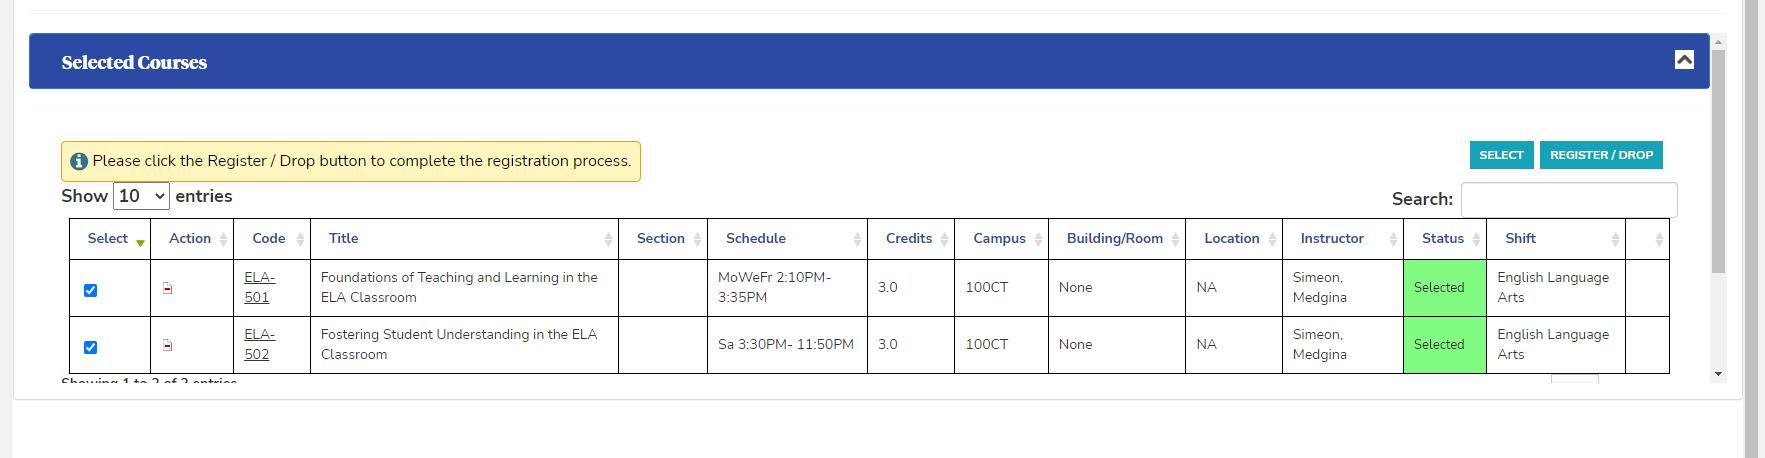
- Scroll down to the Selected Courses list below the calendar:
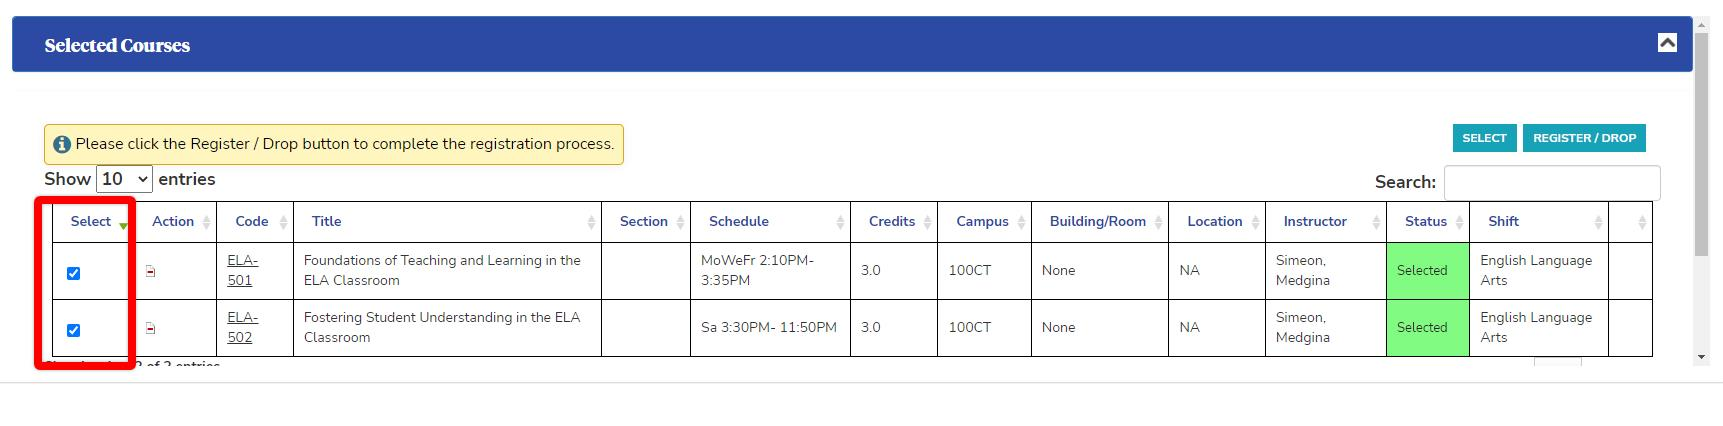
- Select column — keep the checkbox checked to carry that course forward to Step 3, or clear it if you don't want it carried forward.
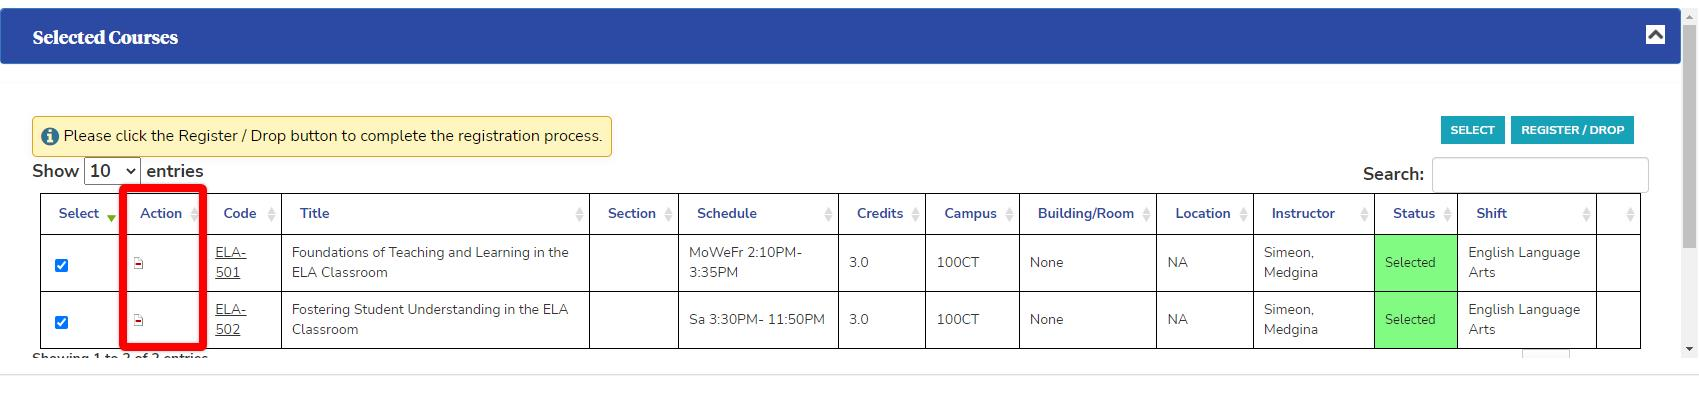
- Action column — use these icons to waitlist, reserve, drop, or remove a course.
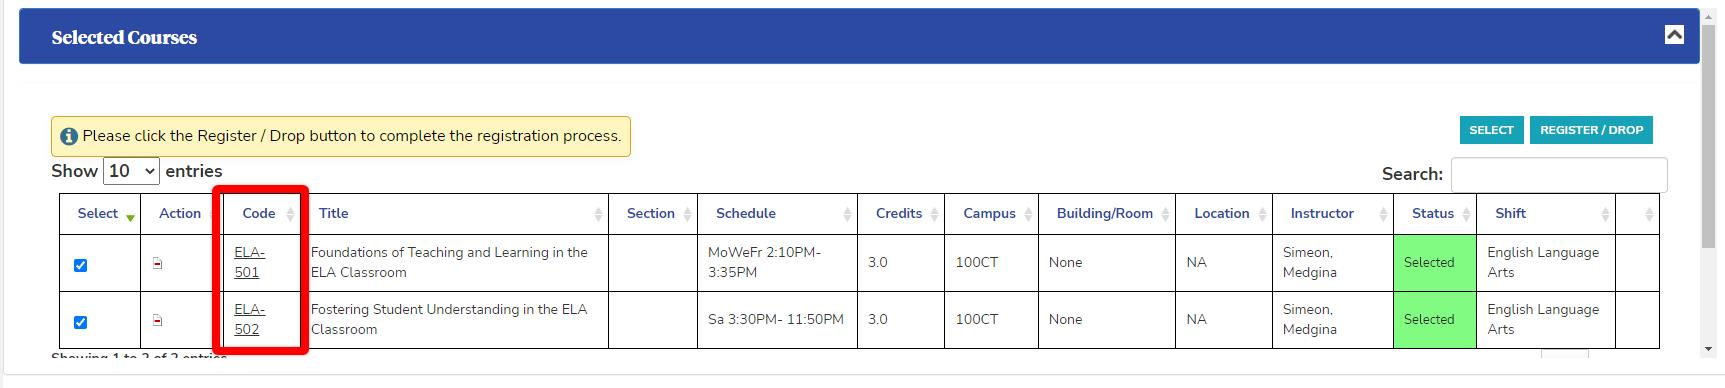
- Code column — select the course code to see its start and end dates, delivery method, location, comments, and schedule. You can also hover over any class on the calendar to see its time, building, room, and instructor.
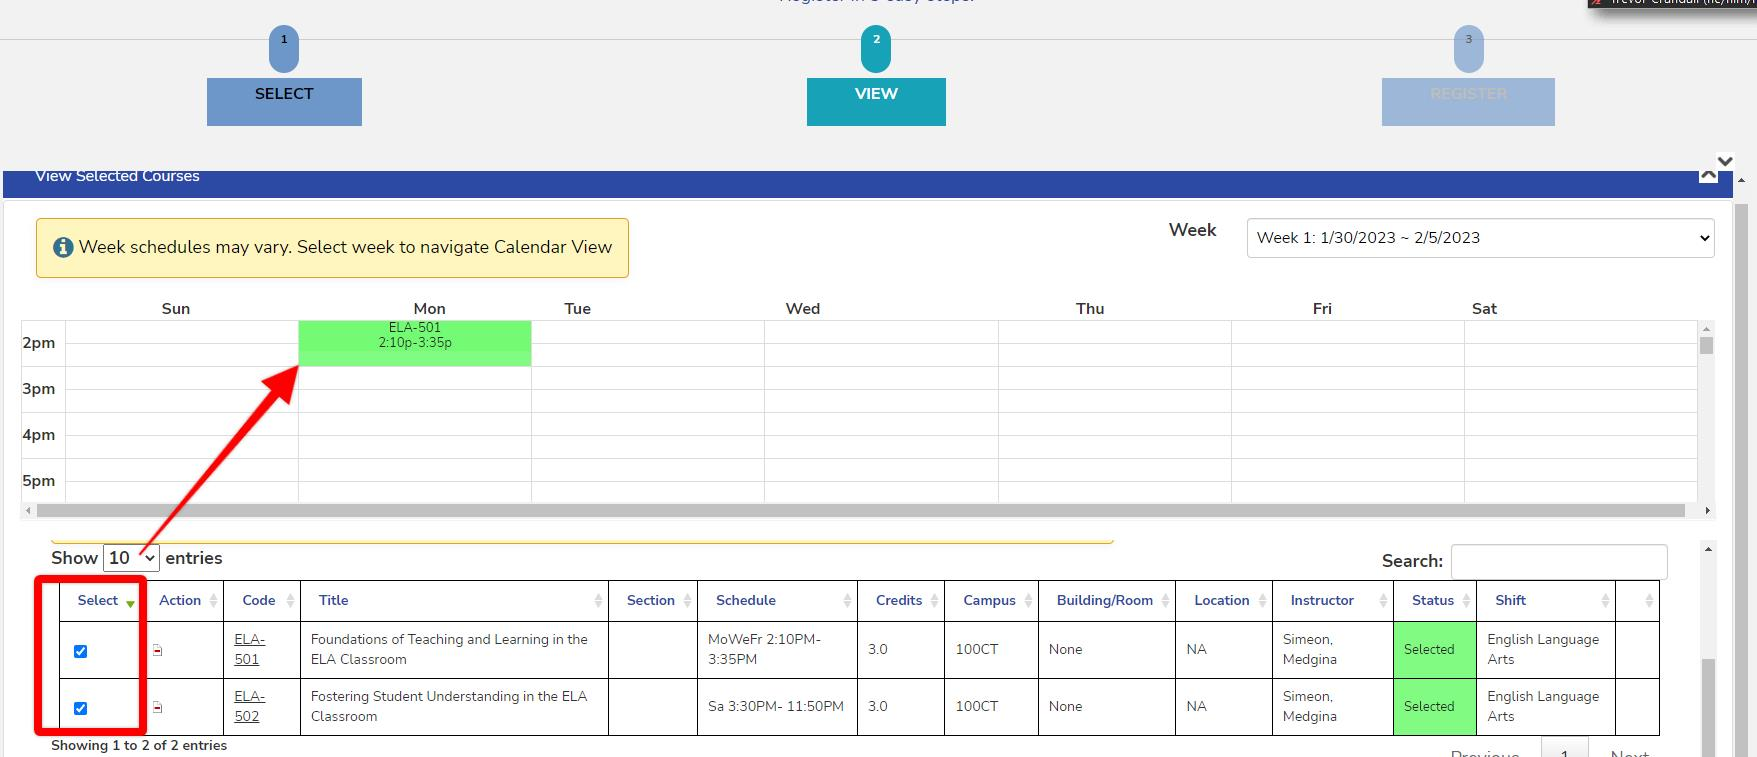
- By default, the calendar shows every course you selected. To narrow it down, clear the Select checkboxes for any courses you don't want to see right now. Each course's color tells you its status (see the table above).
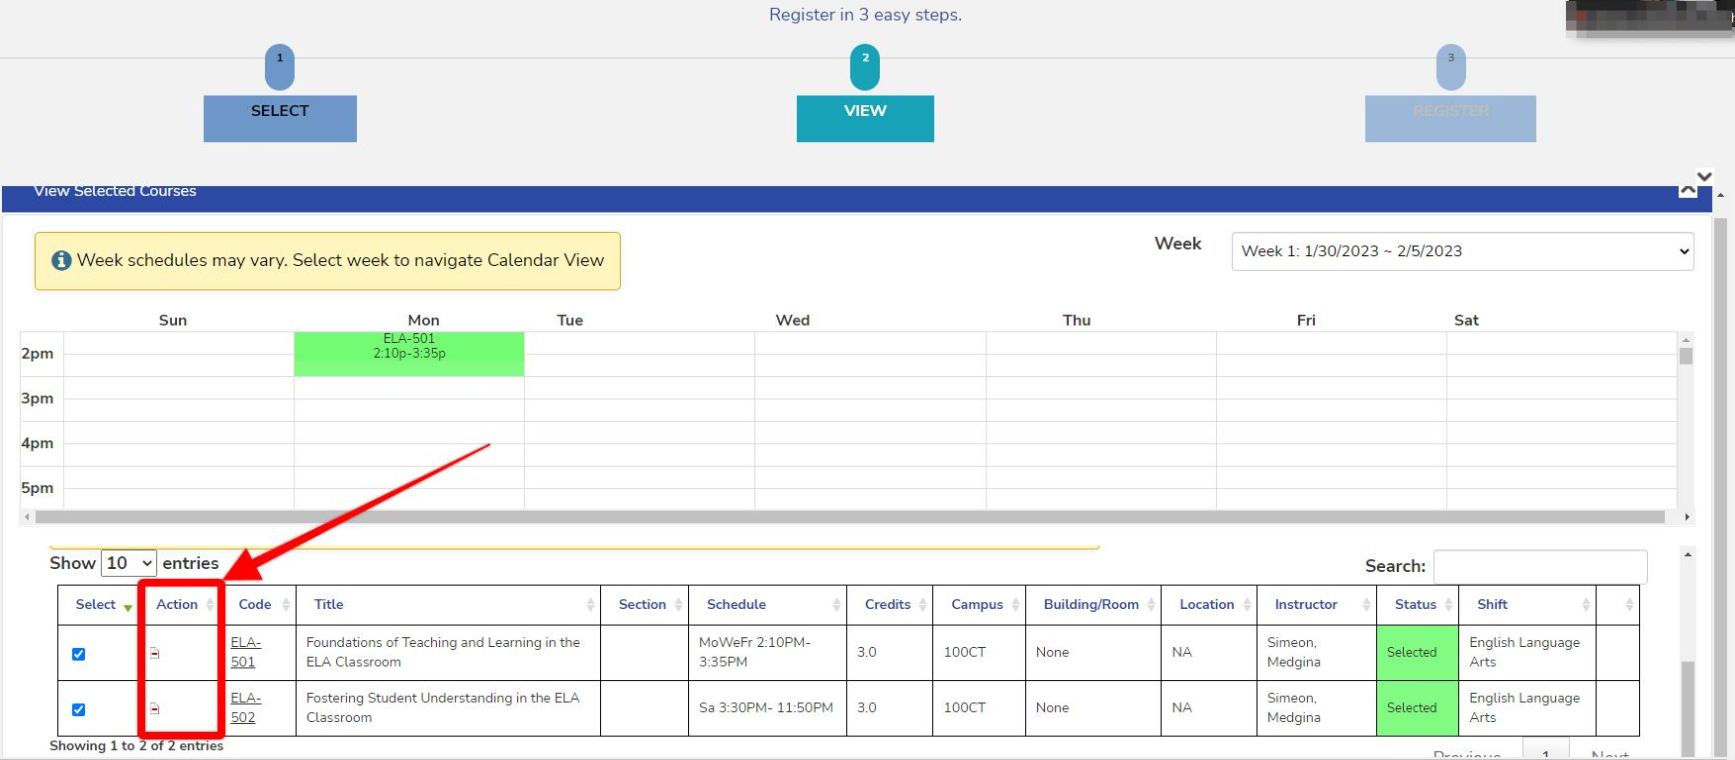
- To drop a course from here, select the Remove icon. You may be asked to choose a reason.
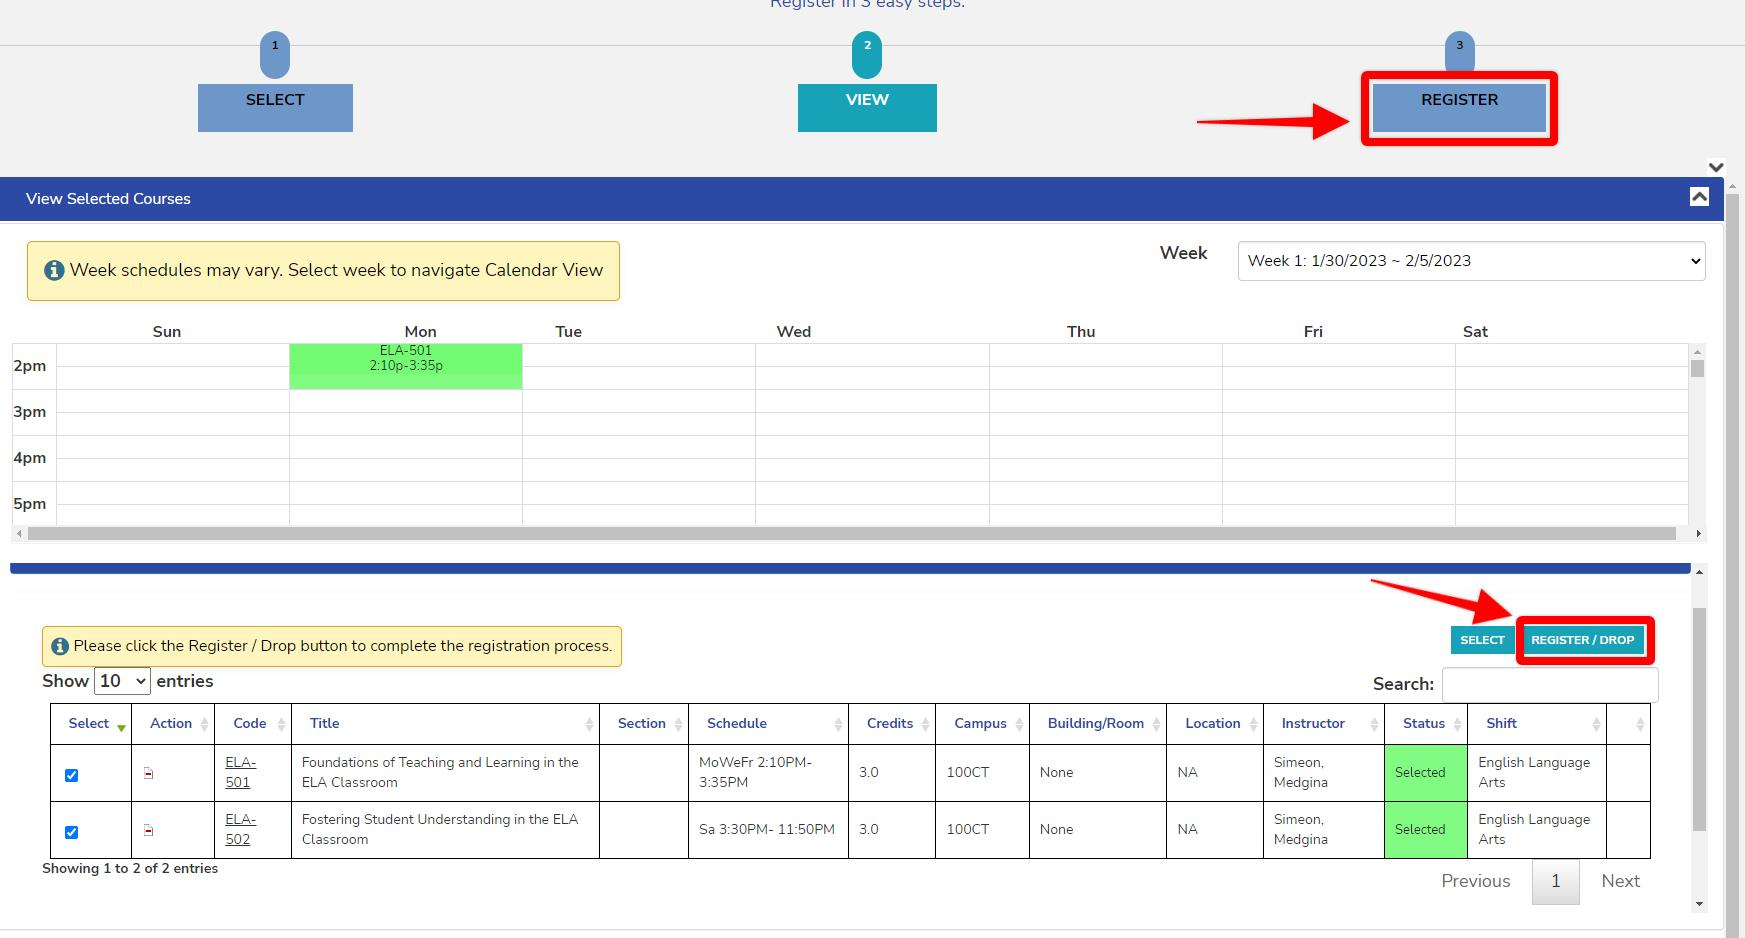
- When you're done reviewing, select Register/Drop to move on to Step 3. Want to change your course selections first? Select Select to return to Step 1.
Step 3 – Complete Your Registration
This is the final step, where your course changes take effect.
🎥 Watch a video walkthrough of this step
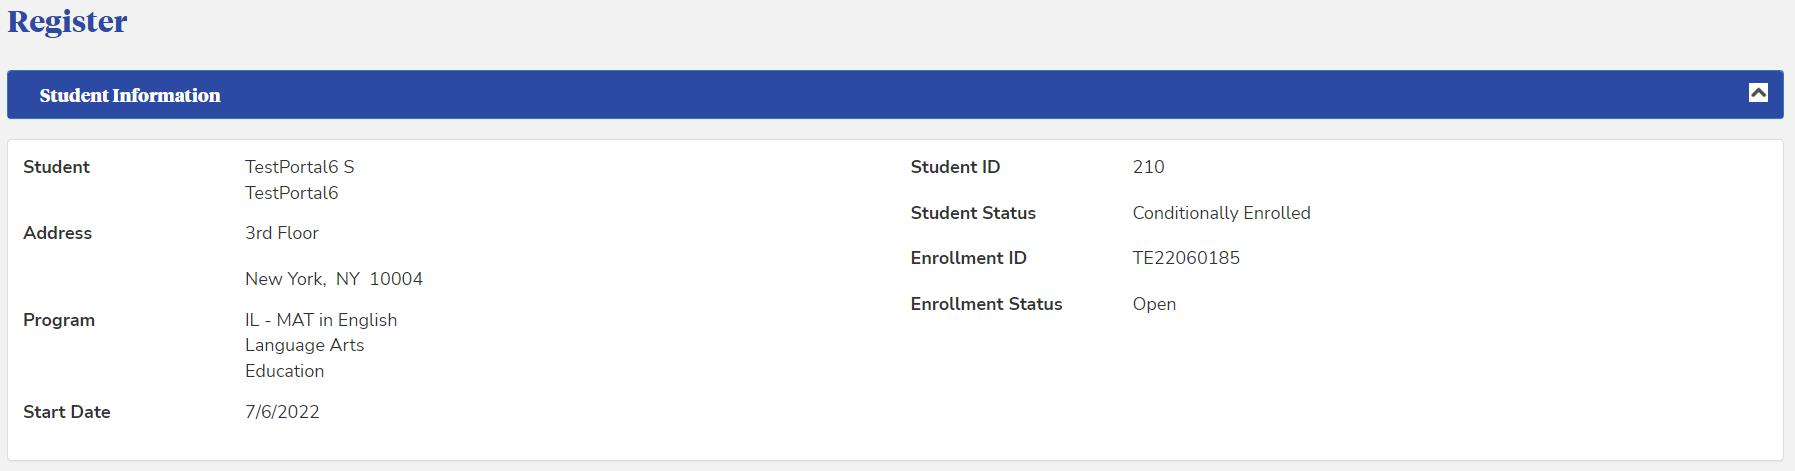
You'll see your Student Information and Class Schedule here.
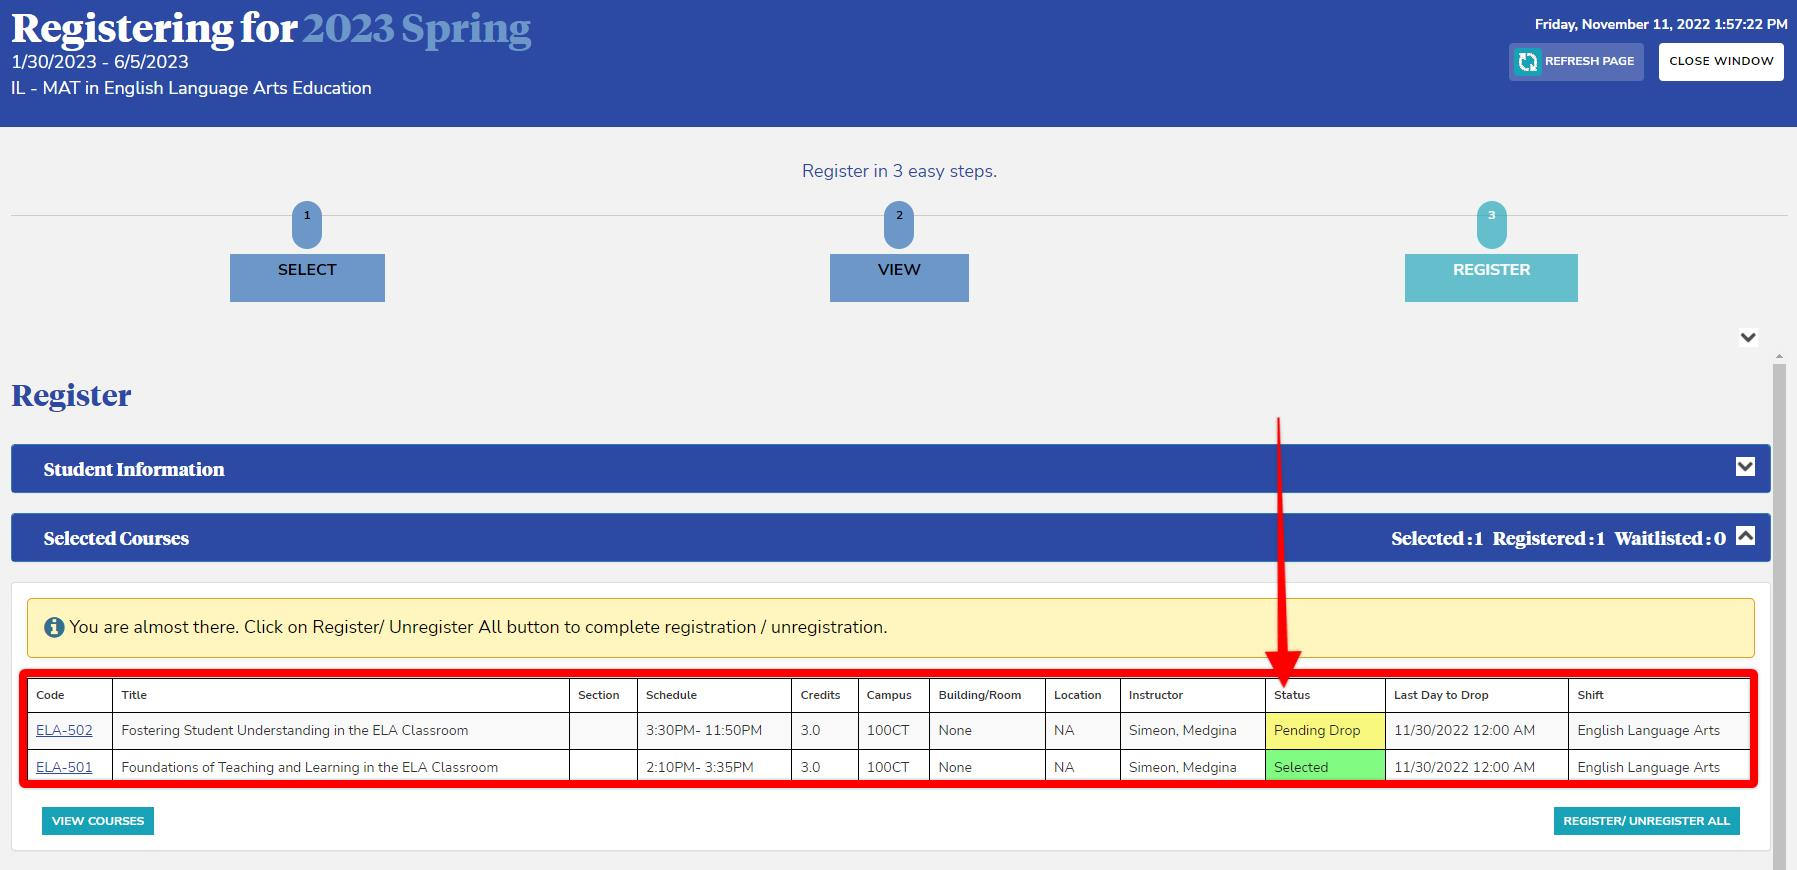
- Confirm that your course additions and drops are listed correctly. If something looks off, select Return to View Courses to go back and make changes (see Step 2).
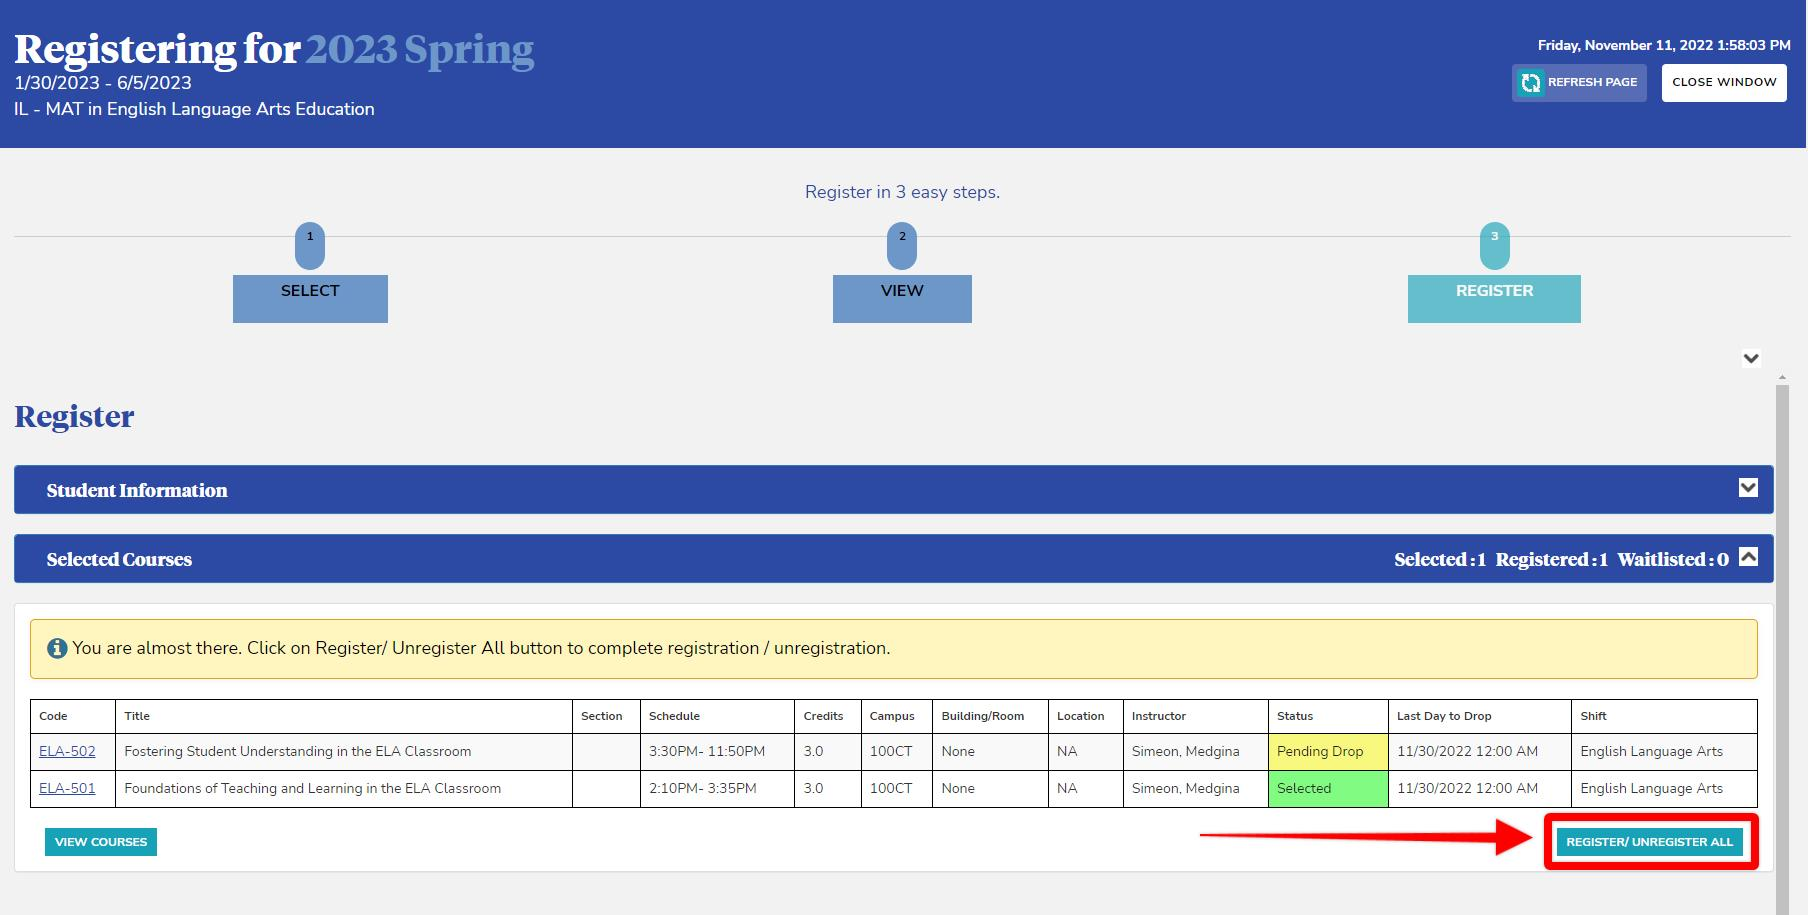
- Select the action that matches what you're doing:
- Register — if you're only adding courses
- Unregister — if you're only dropping courses
- Register/Unregister All — if you're doing both
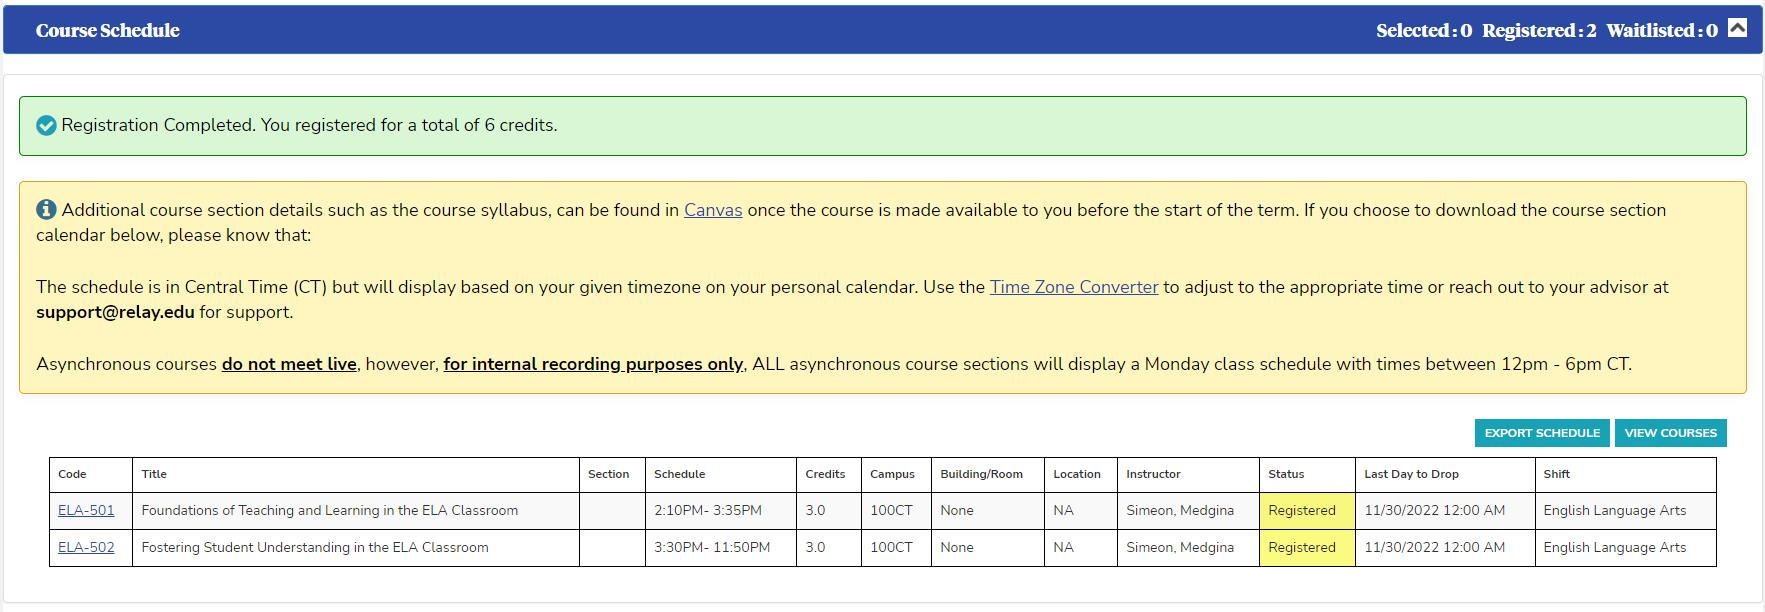
- Your results will display on the page once the action is complete.
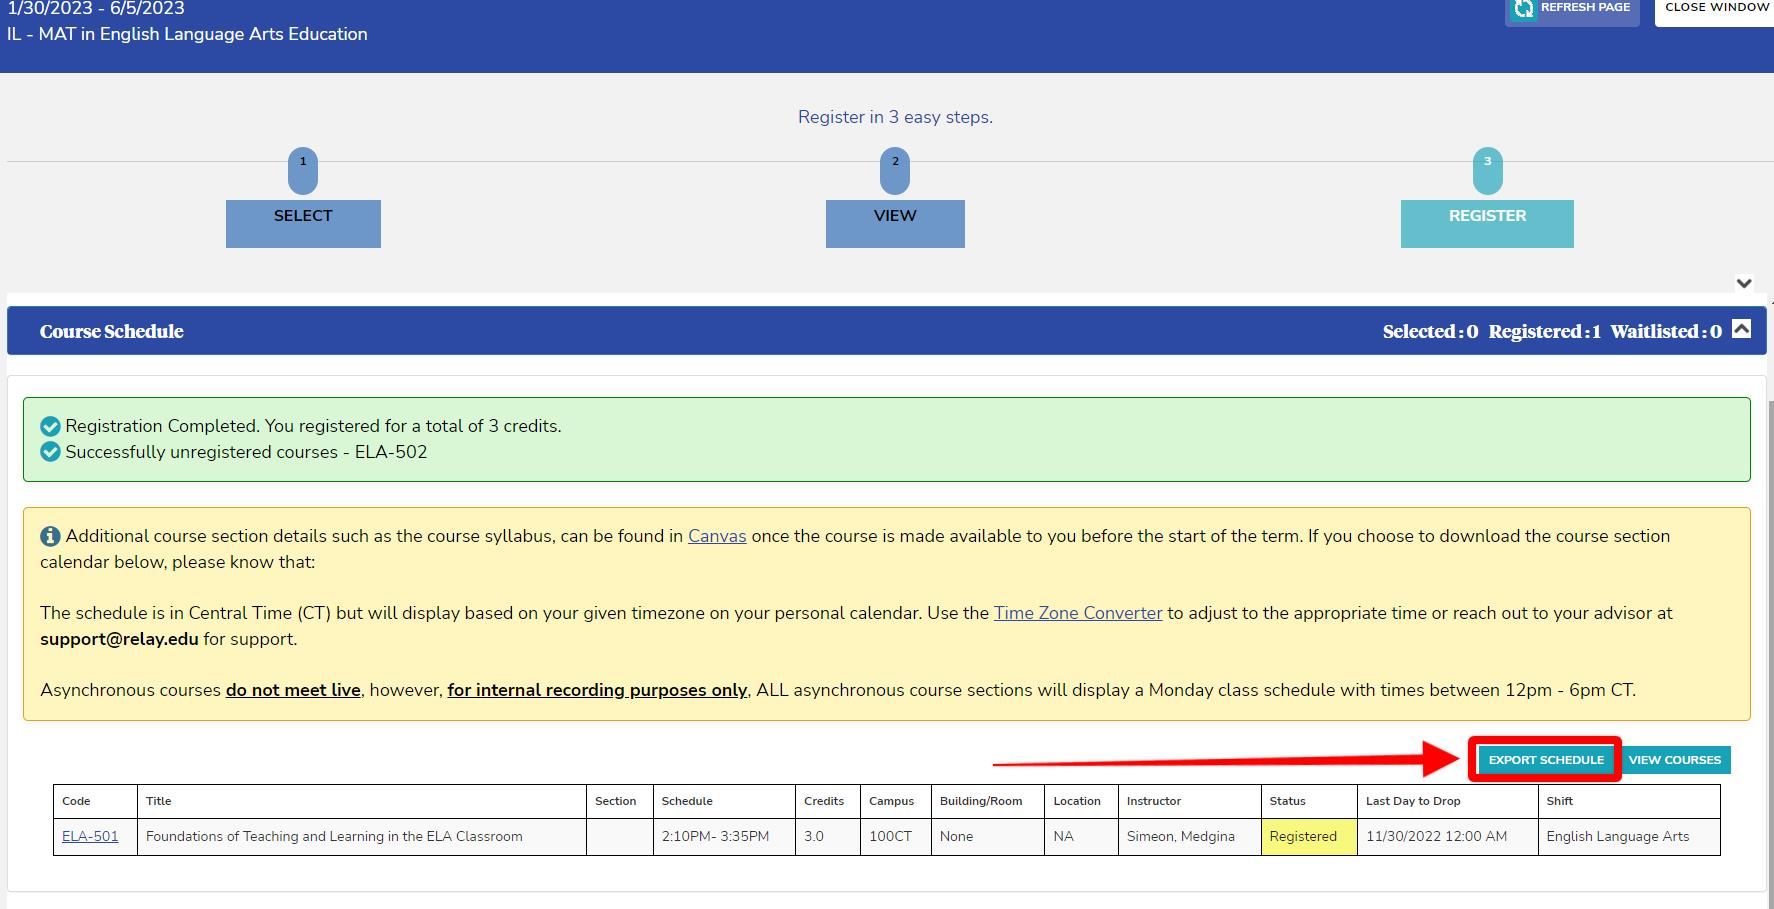
- Select Export Schedule to download a calendar file (event.ics) you can add to your own calendar app.
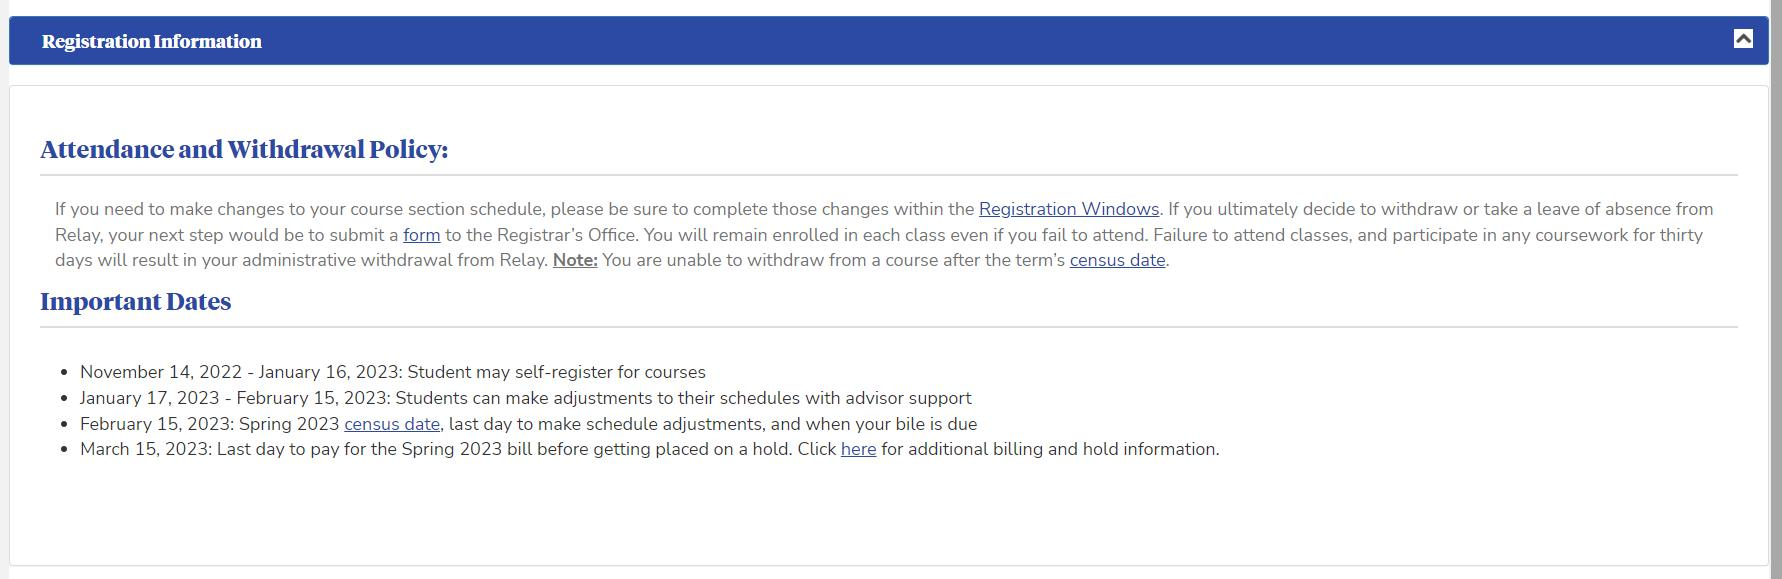
- Expand Registration Information to review the details we provide about your registration.
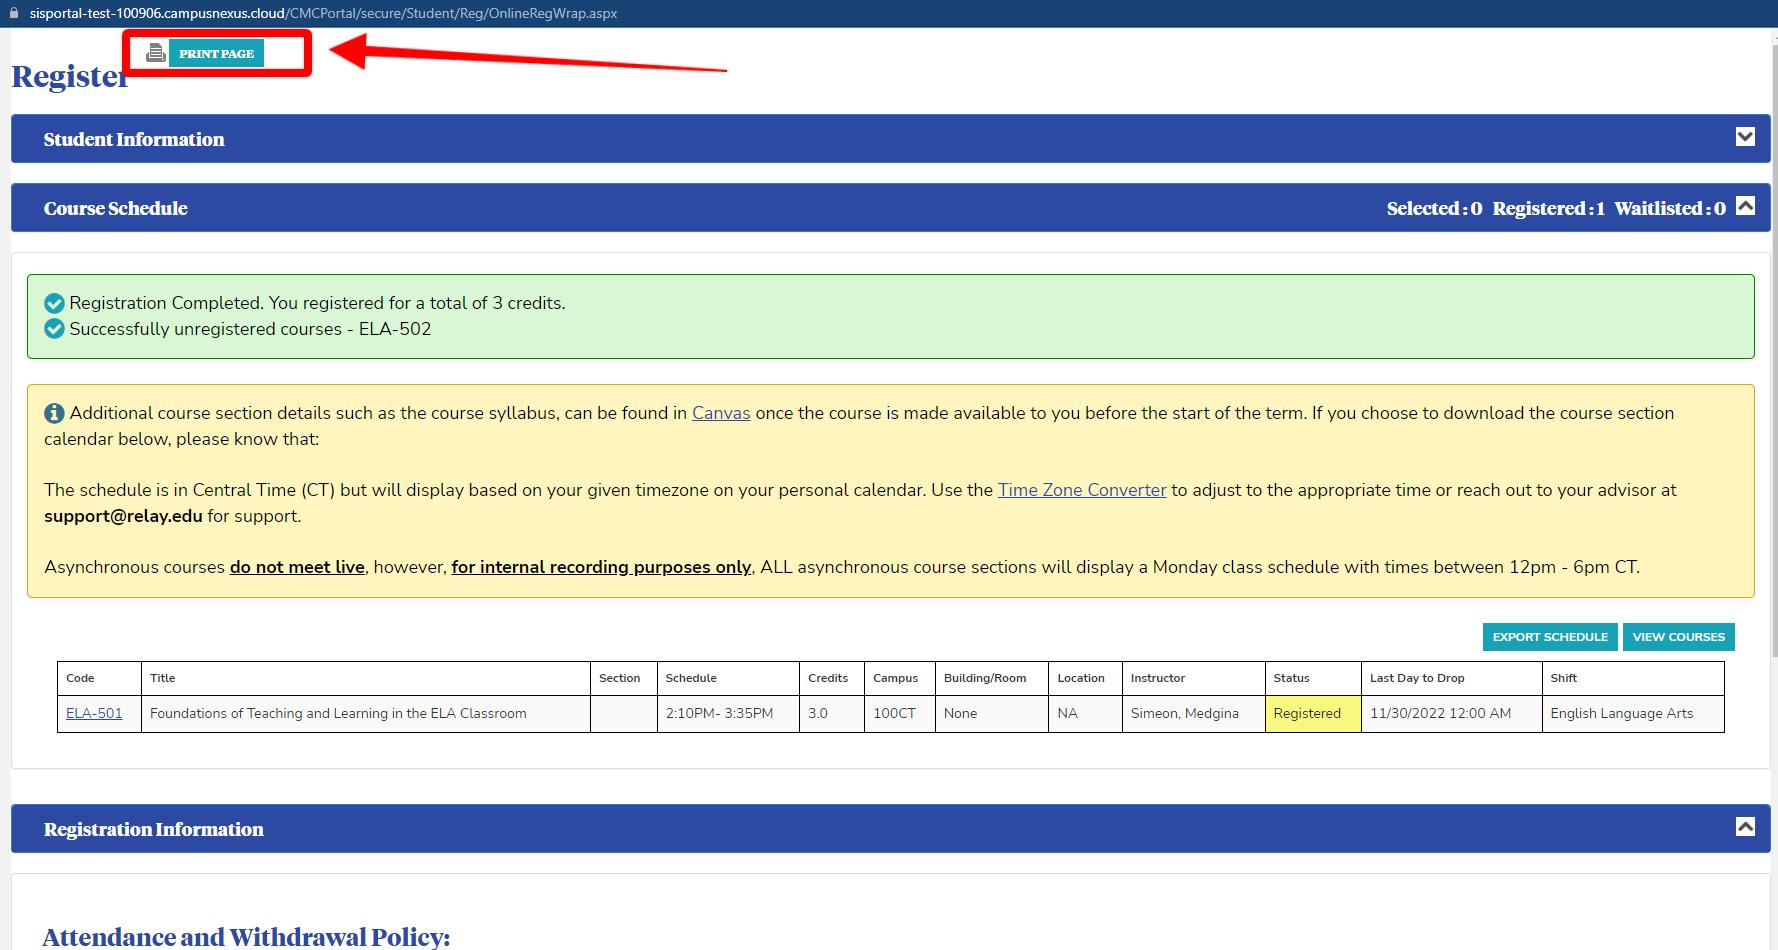
- Select Print Page if you'd like a copy for your records.
- Close the registration window when you're finished.
Need to drop a course you've already registered for? See How to Unregister From Courses.
Have a general question about registration? Check our Student Registration FAQ. [LINK NEEDED]
Still stuck, or have a question specific to your situation?
- Email us: [email protected]
- Or reach out to your advisor directly — they can help you figure out which program, term, or course is right for your plan.

